When you're reading a site plan for a new building, road, or utility layout, the engineering scale factor tells you exactly how distances on paper translate to real-world measurements. It’s not just a number in the corner it’s what keeps your excavation depth accurate, your pipe slopes correct, and your property boundaries legally defensible. Get it wrong, and you risk costly rework, permit delays, or even safety issues during construction.
What is an engineering scale factor for a site plan?
An engineering scale factor is a ratio that expresses how one unit on the drawing (usually inches or millimeters) corresponds to a specific number of the same units in reality most commonly 1 inch = 20 feet, 1 inch = 50 feet, or 1:100 in metric. Unlike architectural scales (like ¼" = 1'-0"), engineering scales use decimal-based units to simplify field calculations for example, measuring 3.75 inches on a 1" = 40' plan means 150 feet in the field (3.75 × 40).
When do engineers and surveyors actually use this scale factor?
You apply the engineering scale factor when transferring dimensions from the site plan to the ground like setting stakes for a storm drain alignment, verifying lot line setbacks, or checking clearances between a new foundation and an existing utility easement. It’s also essential when digitizing paper plans into CAD or GIS: entering the wrong scale factor skews all downstream measurements. If you’re reviewing a civil drawing stamped by a licensed engineer, the scale factor is usually listed in the title block or notes section not buried in a legend or assumed from the sheet size.
How is it different from architectural or graphic scale?
Architectural scales often use fractional inches (e.g., ½" = 1'-0") and prioritize visual clarity for building details. Engineering scales favor round, decimal-friendly ratios (e.g., 1" = 10', 1" = 20') because they align with standard tape measure increments and simplify slope calculations (like 2% grade over 100 feet). That’s why you’ll see engineering scale factors used for grading plans, utility layouts, and topographic surveys but rarely for floor plans or interior elevations. For those, you’d refer to guidance on finding scale factor for architectural elevations.
Common mistakes people make with engineering scale factors
- Assuming the scale shown in the viewport or CAD layout matches the intended engineering scale especially if the plan was plotted at a non-standard size or resized digitally.
- Confusing scale factor (a unitless multiplier like 480 for 1" = 40') with scale ratio (like 1:480) they represent the same relationship but are used differently in software inputs.
- Using the same scale factor across multiple sheets without checking each one some site plans mix scales, like using 1" = 50' for the overall boundary and 1" = 10' for a detailed retaining wall section.
- Forgetting that scale factor applies only to linear dimensions not area or volume. Doubling a scaled length doesn’t double the earthwork volume; it squares the area and cubes the volume.
Practical tips for verifying and applying it correctly
First, locate the stated scale in the plan’s title block not the PDF zoom level or print settings. Then test it against a known dimension: find a labeled distance (e.g., “Lot Width: 120’”) and measure that line on the printed sheet. If it measures exactly 3 inches, the scale is 1" = 40'. If it measures 2.4", then the true scale is 1" = 50'. You can also cross-check with surveyed control points or GPS coordinates marked on the plan. For hands-on practice with how scale affects real infrastructure, see how students apply similar reasoning in model bridge construction using scale ratio.
Where to find the official scale factor on a site plan
Look in the lower-right corner of most civil engineering drawings often inside the title block or adjacent to the north arrow and revision cloud. It may appear as:
- “Scale: 1 inch = 40 feet”
- “Scale: 1:480” (since 40 ft × 12 in/ft = 480)
- “Engineer’s Scale: 1″ = 20′” explicitly naming the discipline
If it’s missing or ambiguous, don’t guess. Contact the design firm or check the project specifications. Never rely on the default scale in your CAD software unless you’ve confirmed it matches the drawing’s intent.
Before printing or staking out, double-check your scale factor against two independent dimensions on the plan and verify that your field tools (total station, GPS, or even a good tape measure) are set to interpret distances consistently. If you’re preparing a plan for submission, make sure the scale factor is clearly called out in both the title block and the cover sheet notes. For more context on how this fits into full-site documentation, visit the dedicated page on engineering scale factor for a site plan.
Next step: Grab your most recent site plan, find the scale notation, and measure one labeled distance with a ruler. Calculate the implied real-world length and compare it to the label. If they match within 0.5%, you’ve got the right scale factor. If not, dig deeper before ordering materials or calling the survey crew.
 Solving Autocad Scale Factor Problems in Maps
 Mastering Blueprint Scale Calculation for Practical Projects
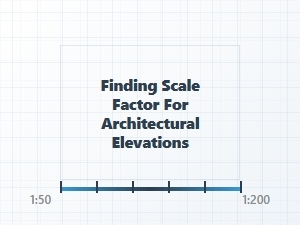 Applying Scale Factors to Architectural Elevations
 Advanced Scale Factor Calculation Exercises
 A Guide to Reverse Scale Calculation for Architects
 Mastering Scale Factor Problems Using Coordinate Grids